I will be the first to admit I am not the best at home decor. I have tons of empty wall space and nothing to fill it with. This DIY will help solve that problem! With all the projects saved to my Pinterest boards this one is by far the best one I have come across. Even the most craft inept mom can handle it.
Originally this project was meant to be a Father’s Day gift to my husband, but somehow took months to finish because the DIY I had found online was much more complicated than the method I am going to show you today. So here it is, my easier and cheaper version of the DIY oversized wall photo print.
SUPPLIES
–one high quality photo filtered in black and white
-hot glue gun
-string or yarn
-hammer and nails
-the ability to drive to hobby lobby and let someone else do most of the hard work
DIRECTIONS
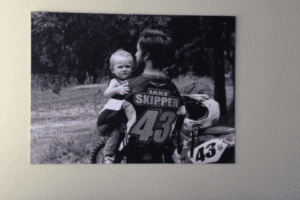
-First you need to find a high quality photo, this step is important because if the photo is blurry it will not work blown up. I used a photo I took on my Canon Rebel T3i. Another helpful tip is to make sure your photo is of something close up. A shot of your sweet babies face or something with a clean background will get you better results.
-Next you are going to want to transfer your photo into black and white. Make sure nothing is too dark on something like a face because it will come out black. I made that mistake and my toddlers eyes look slightly creepy.
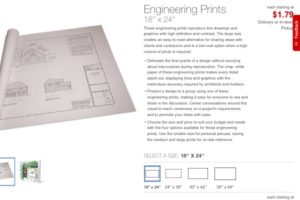
-Now you want to go to Staples.com and select and Engineering Print. Choose the black and white option, you can do color but i have heard the quality isn’t great. There are 4 sizes, I went with 36″x48″. You will upload your photo and pick it up at your local Staples.

-This is the part where I switched things up. The DIY I found said something about buy spray adhesive and applying the photo to ply wood which sounds like way too much room for error if you are craft challenged like me. Instead you will take your print to the framing center at any Hobby Lobby and have them dry mount it for you. The total was about $25 but you can use one of their 40% coupons and cut that way down!
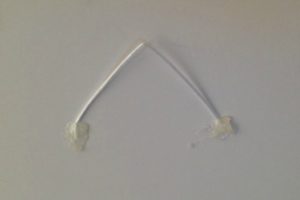
-Once you get your dry mounted print home you will bust out the hot glue gun and string. This part you can adjust to whatever works for you. I cut two 5″ pieces of string and hot glued them on each side of the back of the print to use as hangers.

-Now you get the hammer and put two nails in the wall the same length apart as your string hooks. You can also use some Command strips as well if you aren’t wanting to put any holes in the wall.
VOILA! You did it, way to go! You now have a beautiful print for probably 1/4 of the cost if you had of ordered a canvas online. I hope you enjoyed my DIY, if you have any questions leave them in the comments below and I will do my best to help!


