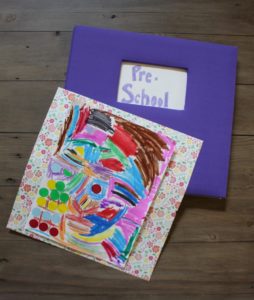
School’s been back in session for a little over a month now (thank goodness) and balance has been restored in the universe. I get some peace in my day, even it’s just quiet time in the bathroom at work, and my kids get to enjoy new activities with friends. This also means their little hands come home full with all the art projects they make during the day. I love seeing what my child has created at school, and it helps me to understand what they’re learning. I also like watching their excitement as they tell me about each project and I enjoy giving praise for their accomplishments. I usually have great aspirations to hang my kids’ artwork all up over the house, but that’s all over once it hits the kitchen counter, as I sweep up school bags, whip out snacks, and prep for dinner. It gets shuffled aside into a pile and doesn’t see the light of day for a long, long time.
Ideas for Displaying Kids’ Artwork
I constantly struggle to find ways to display our kids’ artwork. There is so much of it that I tend to run out of space quickly, hence, the pile on my kitchen counter. I have found that using several different methods allows me to display more of it throughout all areas of the house. 
Clipboards –You can easily find fun and cute clipboards at most craft stores. They make changing out the artwork easy, and they’re decorative on their own without anything on them.
Kids’ Art Frames – This can take on many variations, and it’s easy to do. You can simply put the artwork in the frame and hang it on the wall, or remove the backing and glue in some cork board for the background and pin the art to the board. For a different look, try stapling twine to the back of a large frame and use decorative clothespins to hang the art. The frames came be hung in different shapes and sizes, and can create a colorful wall of art.
Hanging Wire – This is an easy DIY home project. You can hammer some nails in the wall and tie twine around them for a hanging display. Use decorative clothespins to hang the artwork. This is easy for switching out art on a regular basis.
Ideas for Storing Kids’ Artwork
So you’ve displayed your kids’ artwork, and even replaced it with the new one they just finished. Now what do you do with it? Many moms struggle with the idea of throwing it away, and feel guilt (even if it’s only for two seconds) when they chunk it in the trashcan.
PRO TIP: If you don’t use it, you don’t need to keep it. It may be helpful to set a limit on how much of your kids’ artwork you keep. It’s hard to part with, but it can also make the things you keep even more special. Let your child choose two or three pieces of work to save, and toss everything else. Here are a few ways to store the special artwork you’ve chosen to keep.
Scrapbook – You can find many kinds of scrapbooks at the craft store. Attach the artwork to decorative paper with craft tape and add hand written memories with it.
Binders – Keep a three-ring binder for each child and fill it with sheet protectors to slide their artwork and school papers in. You could also just hole punch the papers and place them in the binders. If you use the sheet protectors, you can also store certificates, report cards, or team sports photos.
Filing System – You can use large plastic containers with lids and fill them with file folders. You can organize or color code them by grade or age. The advantage is you can save all kinds of keepsakes and important documents in the file, but it’s a harder to view them this way.
Artkive – This is a service where you fill a box with your kids’ artwork, send it in, and they will take professional photographs of it for you to access anytime on your phone or computer. You can edit and organize the photos any way you want for a custom hardcover book. Plus, they’ll send back the originals upon request.


